Exporting from an Azure job – Understanding and Managing Storage
There are two other files created as well—an .xml file and a drive-manifest.xml file. You need these files later for creating an import/export job. The disk is now ready to be shipped to Azure. After the disks are shipped to Azure, you can create an import or export job from the Azure portal.
The export process flow for Azure import/export looks like this:

Figure 6.19 – Export process flow
Therefore, you have to take the following steps:
- Navigate to the Azure portal by opening https://portal.azure.com.
- Enter import in the search bar at the top of the portal and click Import/export jobs.
- Click Create import/export job.
- In the next blade, select Subscription and Resource group values and enter a Name value for the import/export job (we will use az104labexport). Set Type to Export from Azure and then click Next : Job details >.
- Select Source Azure region, Storage account, and Blobs to export options, and then click Next : Shipping >. The process is illustrated in the following screenshot:
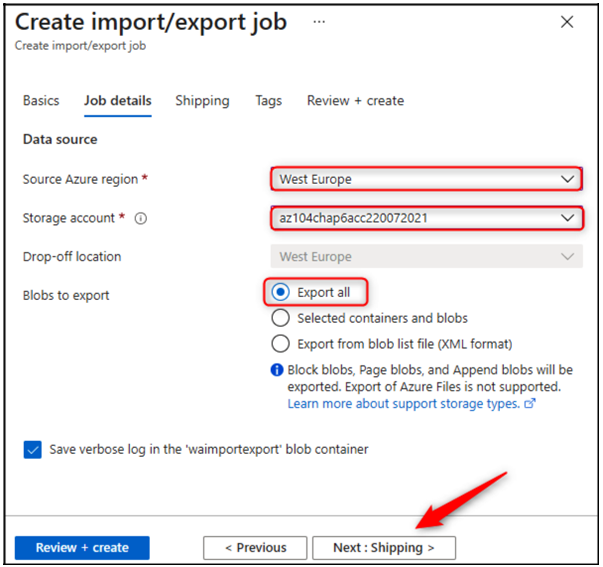
Figure 6.20 – Creating an export job
- Enter your shipping details and click Review + create.
- Once validation has passed, click the I acknowledge that all the information provided is correct and agree to the terms and conditions above checkbox, and then click Create.
Further reading
We encourage you to read up further by using the following links:
• Importing data to blobs: https://docs.microsoft.com/en-us/ azure/import-export/storage-import-export-data-to-blobs?tabs=azure-portal
• Importing data to files: https://docs.microsoft.com/en-us/ azure/import-export/storage-import-export-data-to-files?tabs=azure-portal
• Exporting data from blobs: https://docs.microsoft.com/en-us/ azure/import-export/storage-import-export-data-from-blobs?tabs=azure-portal
Installing and using Azure Storage Explorer
Azure Storage Explorer is a standalone application that can be used to easily work with different types of data stored in an Azure storage account. There is also an implementation in preview in the Azure portal that allows integrated access to storage accounts. You can upload, download, and manage files, queues, tables, blobs, data lake storage, and Cosmos DB entities using Azure Storage Explorer. Aside from that, you can also use the application to configure and manage cross-origin resource sharing (CORS) rules for your storage accounts. This application can be used on Windows, Linux, and macOS devices.
Top Tip
CORS is a mechanism that allows the loading of resources from origins dissimilar to the pattern origin. The feature tells a browser whether it should permit the loading of resources when it detects a CORS pattern. This is a frequently used feature of web design and something to be cognizant of.
Installation
To install the application, you have to perform the following steps:
- Navigate to https://azure.microsoft.com/en-us/features/ storage-explorer/ to download the application.
- Once it has been downloaded, install the application.
- When the application is installed, open the application. Upon first connection, you will be prompted to choose the type of Azure resource you want to connect to. There are several options to choose from, these being Subscription, Storage account or service, Blob container, ADLS Gen2 container or directory, File share, Queue, Table, or Local storage emulator.
- For this demonstration, you will connect Storage Explorer to the subscription level of Azure, as illustrated in the following screenshot. This will run under the context (meaning the permissions) for the user credentials you enter. Click Subscription:
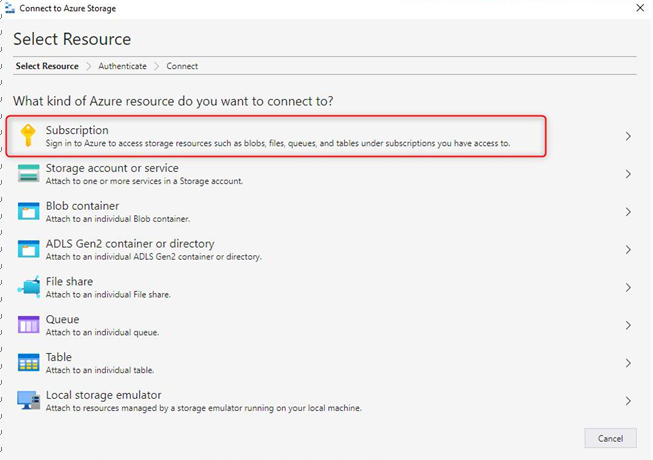
Figure 6.21 – Selecting an Azure resource for Storage Explorer
- You will notice several environments available to choose from; unless you are working in one of the special Azure regions such as China, Germany, or the United States (US) government, you can select Azure, as shown in the following screenshot. Azure is the default environment for most Azure users. Click Next:
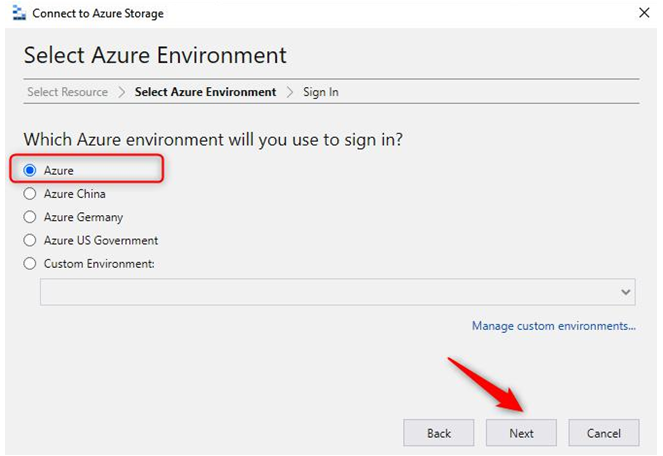
Figure 6.22 – Selecting an Azure environment for Storage Explorer
- You will be prompted to sign in on the Azure portal, so sign in and click Next, as illustrated in the following screenshot:
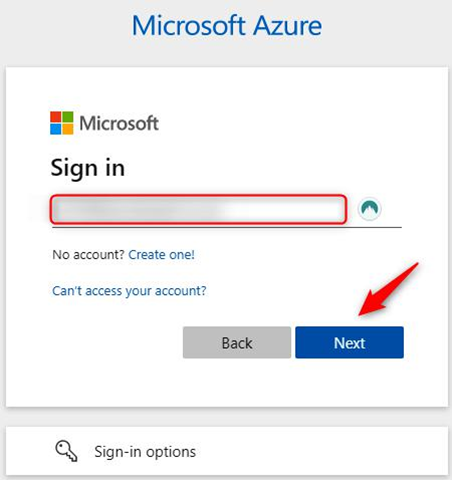
Figure 6.23 – Signing in to Azure
- You will be directed to the ACCOUNT MANAGEMENT page, as illustrated in the following screenshot. Click Open Explorer at the bottom of the screen to view your storage information:
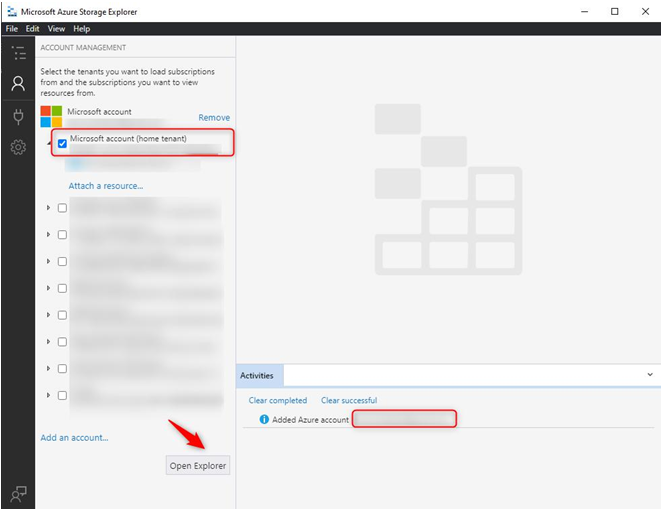
Figure 6.24 – Adding an account to Storage Explorer
Top Tip
Azure Storage Explorer uses your default browser to authenticate you. If you wish to change this and instead sign in with the relevant credentials, you can go to the Settings menu, scroll down to Sign-in, and change the Sign in with: drop-down box to Integrated Sign-in.
- On the EXPLORER menu, take some time to familiarize yourself with the different storage options presented. Expand the subscription you have, then expand Storage Accounts, and expand any account you have to view its storage options available. Notice in the following screenshot the storage types, as discussed earlier in the chapter:
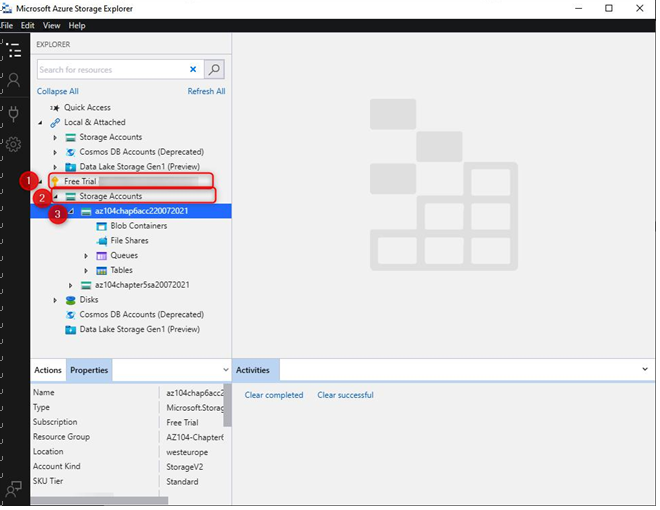
Figure 6.25 – Using Storage Explorer
You have now connected to Azure Storage using Storage Explorer. In the subsequent sections, we will explore storage management using both the Azure Storage Explorer application and the Azure portal.