PowerShell scripts – Understanding and Managing Storage
Please ensure that the Az module is installed, as per the Technical requirements section at the beginning of the chapter.
The following script will create a new storage account (change the parameters to suit your requirements):
First connect your Azure account credentials Connect-AzAccount
Parameters
$ResourceGroup = “AZ104-Chapter6”
$Location = “WestEurope”
$StorageAccountName = “az104chap6acc220072021”
$SkuName = “Standard_LRS”
Create the Storage Account New-AzStorageAccount -Name $StorageAccountName
ResourceGroupName $ResourceGroup -Location $Location -SkuName $SkuName
Further reading
That brings this section to an end. In this section, we have learned how storage accounts can be created using the Azure portal or Azure PowerShell.
We encourage you to read up further by using the following links:
• Point-in-time restoration for blob storage: https://docs.microsoft.com/ en-gb/azure/storage/blobs/point-in-time-restore-overview
• Soft delete for blob storage: https://docs.microsoft.com/en-gb/ azure/storage/blobs/soft-delete-blob-overview
• Data protection overview: https://docs.microsoft.com/en-gb/azure/ storage/blobs/data-protection-overview
Using Azure Import/Export
Azure Import/Export is a service that allows you to import and export data quickly and securely to and from an Azure data center. Data imported is stored either in Azure Blob storage or Azure Files. The value of the services is for managing large amounts of data into or out of Azure where time to get data out is of importance, or costs associated with the transfer of data in and out of Azure are too prohibitive.
The disk drives that are going to be shipped to the Azure data center need to be prepared before shipment. BitLocker encryption needs to be enabled, and once the volume is encrypted, you can copy data to it. After encryption, a disk needs to be prepared using the WAImportExport.exe tool. By running this tool, a journal file is automatically created in the same folder that you ran the tool. There are two other files created as well—an .xml file and a drive-manifest.xml file. You need these files later for creating an import/ export job. The disk is now ready to be shipped to Azure. Follow this Microsoft article for more details: https://docs.microsoft.com/en-us/azure/import-export/ storage-import-export-data-to-files?tabs=azure-portal-preview.
Top Tip
You may come across Azure Data Box Disk in your studies and find its offering looks similar to Azure Import/Export. The key difference is that Azure Data Box Disk is a service where you import Microsoft-owned devices as part of Azure Data Box, whereas Azure Import/Export supports your own disks as long as they conform to requirements.
Importing into an Azure job
After disks are shipped to Azure, you can create an import or export job from the Azure portal. The import process flow for Azure import/export looks like this:
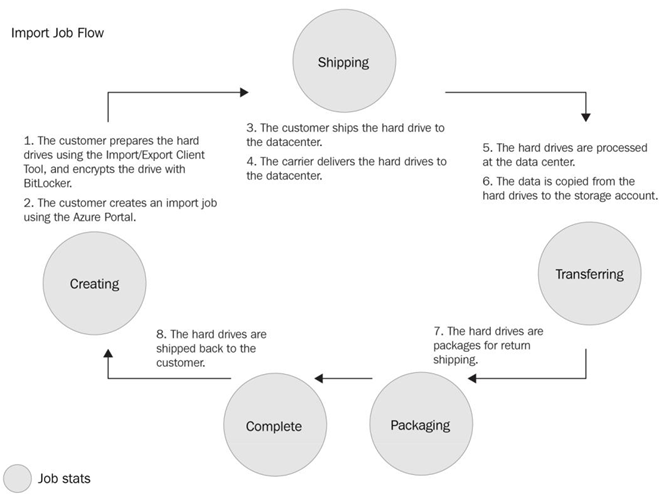
Figure 6.14 – Import process flow
Therefore, you have to take the following steps:
- Navigate to the Azure portal by opening https://portal.azure.com.
- Enter import in the search bar at the top of the portal and click Import/export jobs, as illustrated in the following screenshot:

Figure 6.15 – Searching Import/export jobs
- Click Create import/export job, as illustrated in the following screenshot:
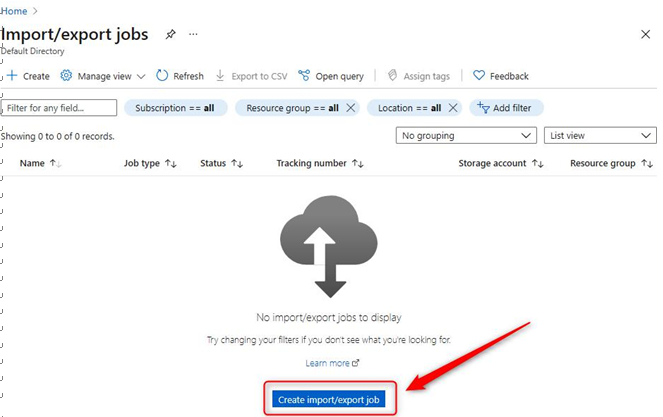
Figure 6.16 – Creating an import/export job
- In the next blade, select Subscription and Resource group values and enter a Name value for the import/export job (we will use az104labimport). Set Type to Import into Azure, and select a Destination Azure region value. Then, click Next : Job details >. The process is illustrated in the following screenshot:
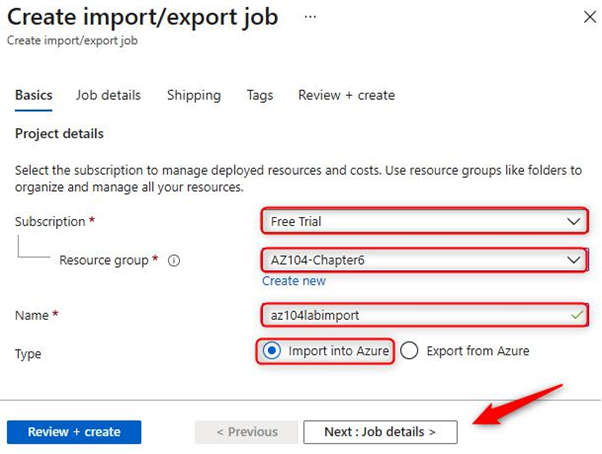
Figure 6.17 – Creating an import job
- Complete the details as per the following screenshot, selecting your journal file. Click Next : Shipping >:
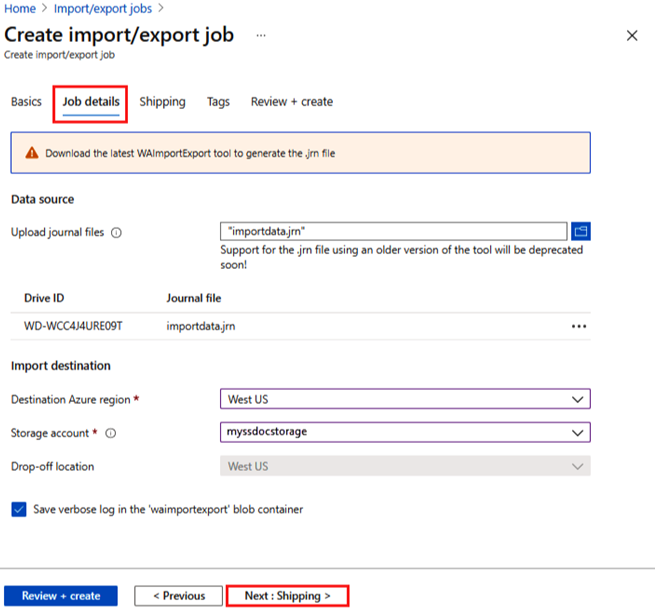
Figure 6.18 – Creating an import/export job: Job details tab
- Enter your shipping details and click Review + create.
- Once validation has passed, click the I acknowledge that all the information provided is correct and agree to the terms and conditions above checkbox, and then click Create.
You have completed the import job process, so we will now review the process for performing an export job from Azure.